Roasted Broccoli

Gluten, Grain, Diry, Egg, Nut, Soy & Refined Sugar free!

This is it. The recipe that  got my almost 2 year old to FINALLY eat his veggies! I was so beyond happy that I finally won the good fight! No need to get into crazy details so here it goes…

Let me know if you try and have a success like I did!

xoxo Jenn

Roasted Broccoli
Preheat oven to 375

1 head broccoli 
1-2 T seasoned "butter" spread

Instructions:

Wash and dry broccoli thoroughly
Cut stems off broccoli and rub completely with melted spread
Bake on a cookie sheet for 20 minutes- watching and stirring 
occasionally so they don't burn
Remove from oven and enjoy!

Pumpkin Granola & Tumbleweeds Galore!

I have come to a whole new level in the kitchen. The ability to throw some ingredients together and miraculously come up with something DELISH!

A last minute lady-date: I had a new friend coming over for my usual Sunday night shows. And of course, I want to have something yummy and healthy to nibble on. So I {no joke} whipped up these bad boys and was super proud of myself!

They aren’t exactly like an oatmeal “cookie”… they have a little crunch to them… so I put them under the “tumbleweed” or “haystack” category. Either way, they are a great cheat day snack that not only my family- but my company- LOVED! {Sorry for the lack of pictures.. we were busy nibbling!}

Happy healthy, allergy free eating!

–Follow up post and recipe added onto this blog was in preparation for our family road trip!! I made them using my “Tumbleweed” recipe as a base and they were a bite sized success!! It seemed silly to me to make a whole other blog with these two recipes being so closely related, so they are now blog buddies!! Thanks again for stopping by and I cant wait to enjoy these granola bites on the road tomorrow!! -Jenn

Pumpkin Oat Tumbleweed

2 Cups Gluten Free Old Fashioned Oats

1/2 Cup Pumpkin Puree

1/4 Cup Raw Honey

1 teaspoon Apple Pie Spice

1/2 teaspoon Vanilla extract

Handful Enjoy Life chocolate chunks

1. Mix all ingredients in a mixer on low speed until combined.

Don’t add the chocolate chunks until after everything else is mixed.

2. Using a cookie dropper {kinda like a miniature ice cream scooper}

scoop out your batter and arrange on a baking dish about an inch apart.

3. Bake 10 minutes on 350*.

4. Enjoy!

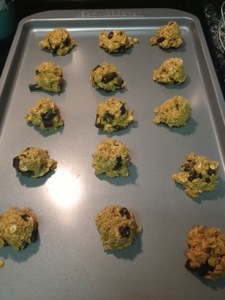
20130610-151124.jpg

Here is a little picture of the batter spaced out on the cookie sheet prior to baking. Again, sorry for the lack of after pictures but I can tell you that they will look… well… the same!

Pumpkin Granola Bites

2 Cups Gluten Free Old Fashioned Oats

1/2 Cup Pumpkin Puree

1/4 Cup Raw Honey

1 teaspoon Apple Pie Spice

1/2 teaspoon Vanilla extract

1 T coconut oil

Handful Enjoy Life chocolate chips

1. Mix all ingredients in a mixer on low speed until combined.

Don’t add the chocolate chunks until after everything else is mixed.

2. Using your teaspoon – packed tight with batter- scoop out little “bite” size pieces and form into balls.
3. Line baking sheet with “bites” and bake at 350 for 20-25 minutes
4. Remove from oven, enjoy!
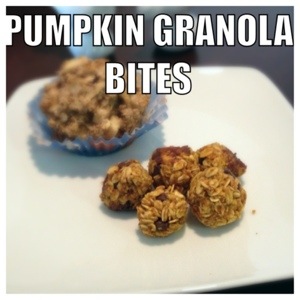
20130802-201727.jpg

Pumpkin Chocolate Chunk Bars

Pumpkin Chocolate Chunk Bars

1 cup brown rice flour

1/2 T ground pumpkin pie spice

-or apple pie spice- or get creative and mix the two!

1/2 t baking soda

1/4 t sea salt- fine

1/2 cup coconut oil- in its hard state

1/4 cup 100% pure maple syrup

1/4 cup + 1 T unsweetened applesauce

1 t vanilla extract

7 oz (about half of a 15oz can) of organic pure pumpkin puree

1 handful Enjoy Life Chocolate Chunks

Preheat oven to 350. Line a medium-sized baking dish* of choice with aluminum foil so that the foil hangs over the edge.

Whisk together the flour, pumpkin or apple pie spice, baking soda and salt in a bowl and set aside.

In an electric mixer bowl add your coconut oil and maple syrup. Mix for a couple of minutes on medium/low-speed until smooth. {It takes a moment for the two to blend well.}

Add the applesauce, vanilla, and pure pumpkin and continue mixing on medium speed. Scrape down the sides of the bowl to be sure to incorporate all the ingredients and continue mixing.

Once mixed add in your dry ingredients and let mix until just combined. Scrape down the sides of the bowl and mix again.

Add in your chocolate chunks by folding them in with your spatula.

Pour batter into the prepared baking dish and bake for around 35-40 minutes. Check for doneness by inserting a butter knife into the center – if it comes out clean your bars are done- if it comes out chocolatey then you hit a chocolate chunk and you need to move a little to the left and check again!

This step is very important because you are working with a different type of flour and the texture is different– Let COOL for an hour before pulling these out with those extra foil pieces. {I know this will be hard but it will be worth it! …Ok, ok taste a little with a spoon, but you will see how it is very crumbly when fresh out of the oven.} Once cooled and you have pulled them out of the dish, set on the counter and cut into bars. Serve and enjoy! 🙂

*This recipe can be doubled and put into a 9×13 in baking dish but I have had the best results making this as a smaller batch.*

I tried to get a picture before but it was too late… these go THAT fast!!!

I tried to get a picture before but it was too late… these go THAT fast!!!

20130520-210947.jpg

..Ok Ok, we aren’t that hungry! I did manage to save a few to put in the fridge for the rest of the week 🙂

Enjoy these guilt free, allergy free & clean treats on your next cheat day when that urge to go to your local cupcake shop hits you! Then sit back and be proud of yourself for keeping it clean, home-made, and safer! — & If your feeling froggy maybe leave me some feedback :)– Jenn
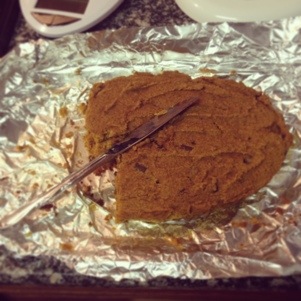
20130520-211001.jpg

Another quick shot before operation DEVOUR

Avocado Salsa

Hey there! I am so in love with this salsa that I am almost positive I could eat it all in one sitting if I let myself!

We put it on our bacon burgers the other day and it was amazing!! We also like it on taco squash, fajitas, or any other Mexican dish you can make:) And Blake LOVES avocado so getting him to eat it is a synch! A fave go-to side dish for a great allergy free, clean eating summer meal! It doesn’t hurt that it’s super easy to make too;)

Storage:
We don’t keep it in the fridge long… maybe a day, but it usually doesn’t last much longer than that anyways:)

AVOCADO SALSA

2 Avocado peeled, cored and cut into chunks
1 large tomato(ripe) cut into chunks
3 T red onion minced
1 T cilantro
2 cloves minced garlic
Lime juice from one lime

Mix all ingredients together and chill until ready to eat!!

20130511-160328.jpg

Enjoy!
-Jennifer