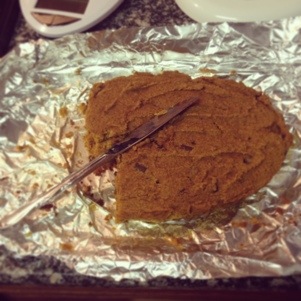
Pumpkin Chocolate Chunk Bars
1 cup brown rice flour
1/2 T ground pumpkin pie spice
-or apple pie spice- or get creative and mix the two!
1/2 t baking soda
1/4 t sea salt- fine
1/2 cup coconut oil- in its hard state
1/4 cup 100% pure maple syrup
1/4 cup + 1 T unsweetened applesauce
1 t vanilla extract
7 oz (about half of a 15oz can) of organic pure pumpkin puree
1 handful Enjoy Life Chocolate Chunks
Preheat oven to 350. Line a medium-sized baking dish* of choice with aluminum foil so that the foil hangs over the edge.
Whisk together the flour, pumpkin or apple pie spice, baking soda and salt in a bowl and set aside.
In an electric mixer bowl add your coconut oil and maple syrup. Mix for a couple of minutes on medium/low-speed until smooth. {It takes a moment for the two to blend well.}
Add the applesauce, vanilla, and pure pumpkin and continue mixing on medium speed. Scrape down the sides of the bowl to be sure to incorporate all the ingredients and continue mixing.
Once mixed add in your dry ingredients and let mix until just combined. Scrape down the sides of the bowl and mix again.
Add in your chocolate chunks by folding them in with your spatula.
Pour batter into the prepared baking dish and bake for around 35-40 minutes. Check for doneness by inserting a butter knife into the center – if it comes out clean your bars are done- if it comes out chocolatey then you hit a chocolate chunk and you need to move a little to the left and check again!
This step is very important because you are working with a different type of flour and the texture is different– Let COOL for an hour before pulling these out with those extra foil pieces. {I know this will be hard but it will be worth it! …Ok, ok taste a little with a spoon, but you will see how it is very crumbly when fresh out of the oven.} Once cooled and you have pulled them out of the dish, set on the counter and cut into bars. Serve and enjoy! 🙂
*This recipe can be doubled and put into a 9×13 in baking dish but I have had the best results making this as a smaller batch.*

..Ok Ok, we aren’t that hungry! I did manage to save a few to put in the fridge for the rest of the week 🙂
Enjoy these guilt free, allergy free & clean treats on your next cheat day when that urge to go to your local cupcake shop hits you! Then sit back and be proud of yourself for keeping it clean, home-made, and safer! — & If your feeling froggy maybe leave me some feedback :)– Jenn


